Existing customer? Sign in
In the self-serve SaaS world, offering a freemium plan or free trial is fundamental to a product-led growth strategy, as users now expect to try before they buy.
But designing a freemium product be a challenge, as you have to strike the right balance between giving users what they want and need, while restricting some features so that they have an incentive to start paying.
In-app messages help convert basic/freemium plan users to upgrade by targeting users at the exact time they really need a feature, highlighting the value they get by upgrading, and creating excitement or FOMO so the user feels driven to do so.
In this recipe, we’ll walk you through how to identify users on a basic payment plan (in Salesforce), launch an in-app Modal that prompts them to upgrade (in Chameleon), and automatically redirect them to book a meeting with their relevant Customer Success Manager or Account Manager at the click of a button (in Chili Piper).
A Salesforce account (Salesforce Enterprise or Salesforce Unlimited)
The first step will be to make sure the data is flowing from Salesforce into Chameleon.
Search for Salesforce in the Chameleon dashboard, click “Connect”, then “Enable”.
Next, you need to associate the unique ID of a Chameleon user to the correct ID field within Salesforce. Click on the “Define mapping” button and select which Salesforce fields should match the unique IDs you're sending to Chameleon, from those listed in the dropdown.


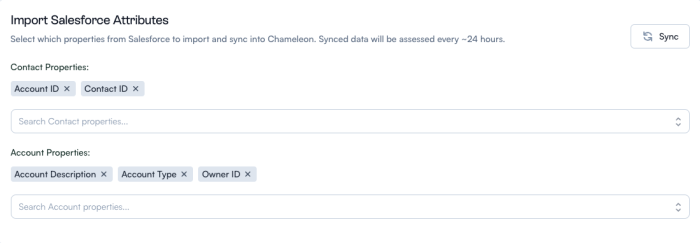
Next, select which contact and account properties you want to use and sync them to Chameleon from the top-right button once you're done. Make sure, at minimum, you’re including Account ID, Contact ID, Owner ID, and Account Type (this will sync the users that are on the basic payment plan).

Next, you’re going to create the segment of users to launch the Chameleon Experience to. Go to Segments and add the following filter:
Salesforce objects > Account type is exactly Basic (or your equivalent Account Type)
Now it’s time to create the meeting in Chili Piper where we’ll direct our segment of users to book.
Head to “Meeting types” in your Chili Piper account and click “Create meeting type”, and give this one a name that’s relevant to these users, for example “Basic plan users upgrade”. Choose the meeting duration, and click “Create”.
Here is a step-by-step guide to set up Chili Piper’s Form Concierge.
To use Form Concierge, it requires the CRM connection to do routing based on records in Salesforce (Lead, Contact, Account, Opportunity, Case) and can route based upon ownership or SFDC fields. Chili Piper writes the meetings booked to Salesforce as an activity on the Event Object. Chili Piper can also re-assign the lead/contact owner based on rules.
If someone books a meeting that isn’t already a Lead or Contact in Salesforce, Chili Piper can create the Lead or Contact so that your reps don't need to do so manually. Optionally for reporting purposes, a set of custom fields can be added to your Salesforce Org.
Now the fun really begins - time to start building your in-app Experience! You’re going to create a Tour Modal to appear when a user clicks on an element that isn’t available on their plan. So head on over to Tours in the Chameleon Dashboard, hit create a Tour, choose Announcement, choose the Modal template and enter the builder.
Build the Modal design
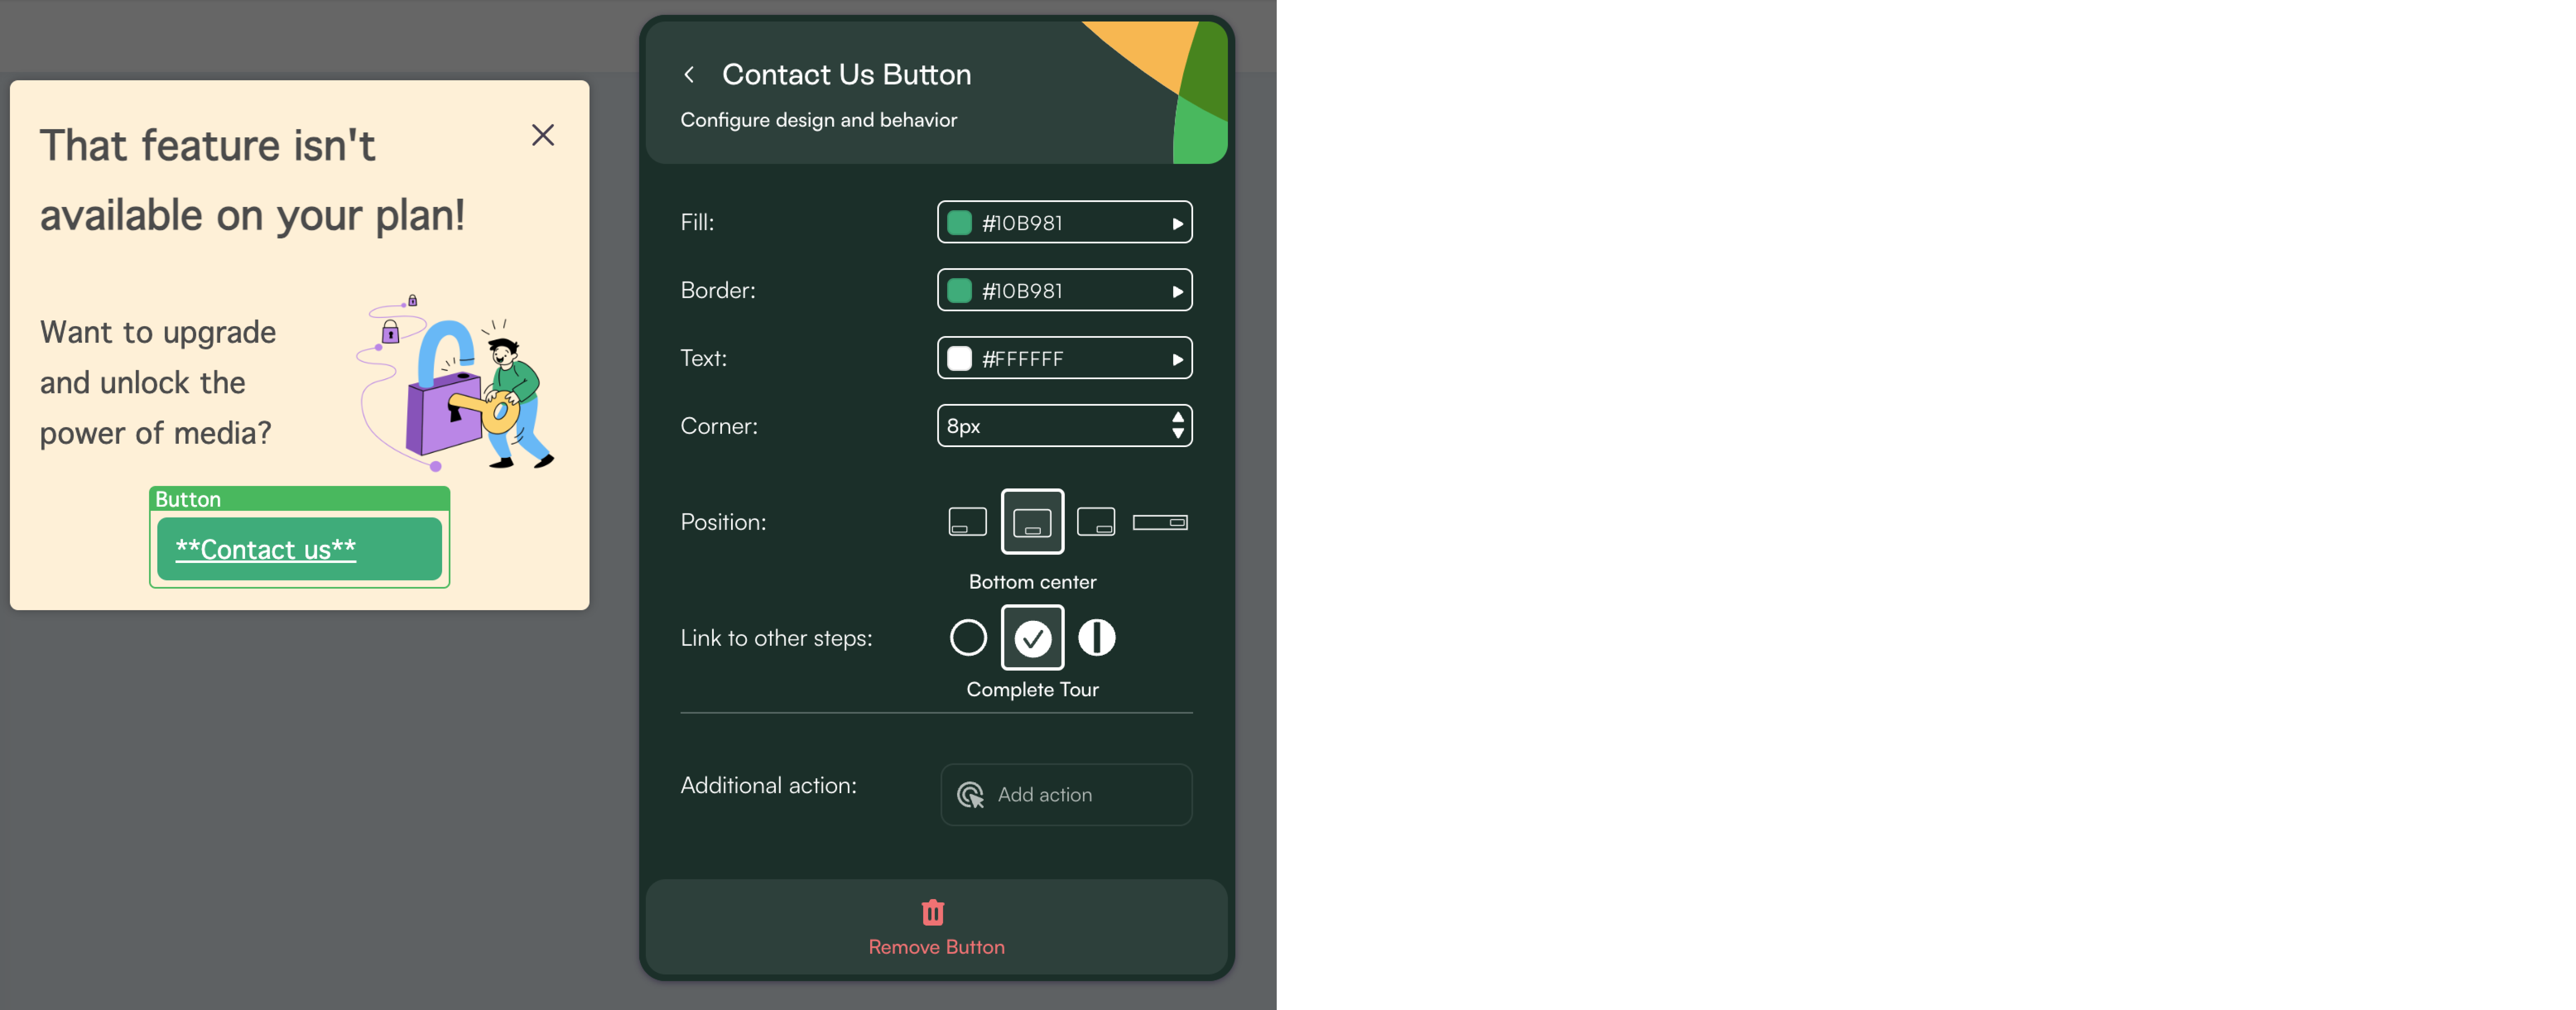
Adjust the color to align with your brand
Add in some relevant copy and an image
To launch the Modal when a user tries to click on the unavailable feature: Select “On-page trigger”, “Click on element”, “Choose element”, “Select”, and click on the feature in your app that isn’t available to those users
To align the position to be next to that feature: Click on “Position”, “Choose element”, “Select”, and click on the feature
Adjust the copy of the button to: “Contact us”, and link to other steps “Complete Tour” (which means you can track and measure this in Chameleon)
 Add Chili Piper scheduling link
Add the link to allow users to instantly book a meeting with your team through Chili Piper. To do this, click on “Add action”, and “Chili Piper”. Then you have two options:
To add a static URL which links to one meeting - head back to the Chili Piper app, find your meeting, and copy the booking link. Head back to your Chameleon dashboard, Select “Static URL” and paste the booking link here.
To use Form Concierge routing, select that option, and enter your router name.
Edit publishing settings
Head back to the dashboard and choose the environment that you want to publish to.
Select the audience, which will be the segment we created earlier - “Basic plan users”.
Select the recurrence to repeat immediately - you want users to see the Experience every time they try and use the feature
Define your goal as Tour completion - this enables you to be able to analyze the success of those who have clicked on the button.
Choose whether you want to publish immediately or on a custom date, and if you want to set the tour to unpublish on a certain date
Go ahead and set your experience live!
You’ve just used Chameleon, Chili Piper, and Salesforce to drive product-led growth through upselling directly in your app, by nudging basic plan users with a personalized in-app Modal to automatically book a meeting with your team. Easy peasy lemon squeezy!
Check out how you can increase trial conversion with Chameleon and Chili Piper and schedule some time with our team to learn more.
Get started free in our sandbox or book a personalized call with our product experts